Friday, May 21, 2010

A Year Long Makeover


I've been trying and trying to not only clean my craft office, but to also define what it is I like to actually work on. Having been in employ with various craft companies, I've always had my job define my projects. Not that I don't love to rubber stamp cards, stencil clothing or make miniatures, I've been wanting to use this time to also figure out what I really enjoy making. And going through my stuff piece by piece has been helping me do that. I'm "throwing" out old artwork and samples, or actually just boxing them up and putting them in my barn. I think I need room for new creativity...So these pictures are a part of that process. Above is a shelf unit I've had, which has always housed things in transit. Artwork for sale, thrift finds just coming into the house..the like. Here's a picture of the cleaning after 2 months...


almost there..but still too many old canvases ad empty boxes..


found this crazy microscope kit from the 60's or 70's..love the shelving inside..for holding slides. But I'll be using it to hold my Conundrums...


the current top shelf, showcasing minis, dioramas, an occasional drawing or painting..and some hats. 


Love this jar, found it at the goodwill..this whole shelf is jars of things. Mushrooms, clips, plastic pendants, stuff and things and more stuff..


This is the shelf now..I just put the cigar boxes there. Loved the post from Cathe Holden, of course, on cigar box storage..I'll be labeling them next. 


next up..the other side of the room...


Wednesday, May 19, 2010

Rain on my Parade


A little bit of inspiration for a hump day...
turn it up and so you can sing along too, the lyrics:

FANNY BRICE;
Don't tell me not to live, just sit and putter
Life's candy and the sun's a ball of butter
Don't bring around a cloud to rain on my parade
Don't tell me not to fly, I simply got to
If someone takes a spill, it's me and not you
Who told you you're allowed to rain on my parade
I'll march my band out, I'll beat my drum
And if I'm fanned out, your turn at bat, sir
At least I didn't fake it, hat, sir
I guess I didn't make it
But whether I'm the rose of sheer perfection
A freckle on the nose of life's complexion
The Cinderella or the shine apple of its eye
I gotta fly once, I gotta try once,
Only can die once, right, sir?
Ooh, life is juicy, juicy and you see,
I gotta have my bite, sir.
Get ready for me love, 'cause I'm a "comer"
I simply gotta march, my heart's a drummer
Don't bring around the cloud to rain on my parade,

I'm gonna live and live NOW!
Get what I want, I know how!
One roll for the whole shebang!
One throw that bell will go clang,
Eye on the target and wham,
One shot, one gun shot and bam!
Hey, Mr. Arnstein, here I am ...

I'll march my band out, I will beat my drum,
And if I'm fanned out, your turn at bat, sir,
At least I didn't fake it, hat, sir,
I guess I didn't make it
Get ready for me love, 'cause I'm a "comer"
I simply gotta march, my heart's a drummer
Nobody, no, nobody, is gonna rain on my parade!

Friday, May 14, 2010

Toppers

The Lagunitas Beer Circus is this weekend and to prepare, a few friends and I dove head first into diy millinery. A few round pieces of cardboard, some old cigar labels from Melissa, and of course, some mini flora and fauna and glitter..and we were off!!


Topper o' the morning to you! This is the hat that matches my dress...


Kristine's beautiful bird's nest...such bella la vida beauty!

Monday, May 3, 2010

Sure Rite!


This past weekend, my friends Melissa and Kristine and I decided we needed a bit of fresh air and foraging. We found ourselves losing some time at the flea market...looking for nothing in particular, but loving the treasures we happened upon. It was almost time to go, as in "I'm hot and hungry and already scored", and we were at the last row of tables when my hand landed upon this neat old shipping box.


I looked down and saw the nameplate on this silver machine, reading Sure Rite Duplicating Machine from Amercian Stencil MFG. Stencil? Must have. I paid what I had left in my pocket and got the whole box. 


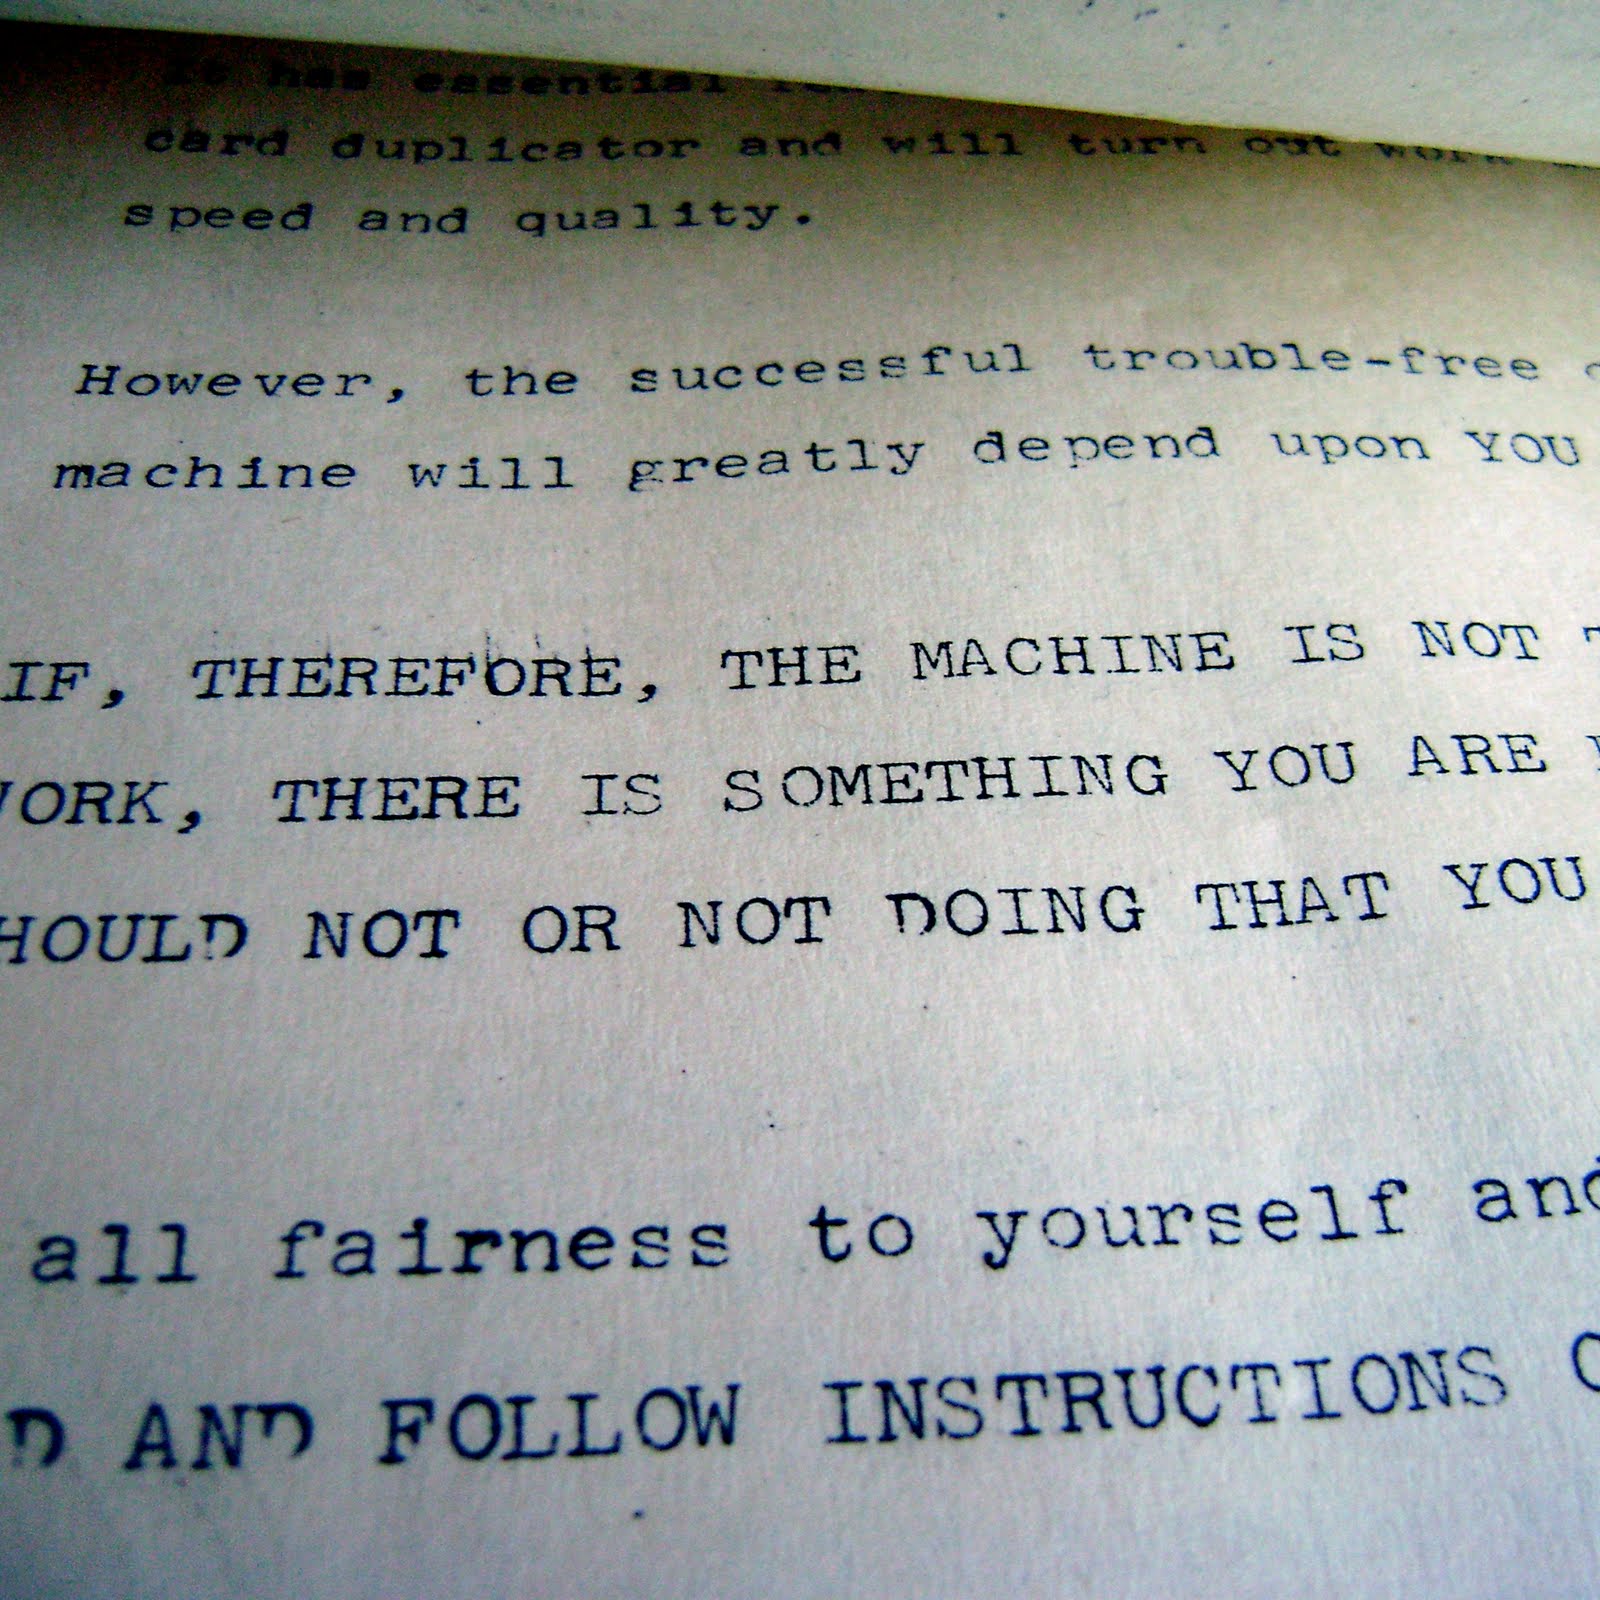
All of the parts are there, including the stylus in it's original plastic tube packaging. There are two bottles of bad ink, a used paintbrush, some stencil blanks and the original Instructions, which made me laugh out loud!


This is the first page of instruction and it basically tells you that if this machine isn't working correctly..it's your fault. ;}


and apparantly when using the original stencil blanks, you have to breathe fire to get them to work?

I'm not sure that I'll get this to work the way it was intended, which was for printing government postcards, so says the manual...but I'm itching to play and figure out how it can work for me. and for fun, check out this website of old office supplies...

Wednesday, April 21, 2010

Butter and Eggs Day 2010


Butter and Eggs Day is upon us again, in lil' ol' Petaluma! 


I'm so excited! I haven't been since mom and I closed our store. I grew up walking in and attending this hometown parade..and this year I'm selling stuff! I'll be in a booth with my Craft Mart friends:


Nicole of Vinyl Frontier/StitchCraft;


Jenny of BlockHeadPress;


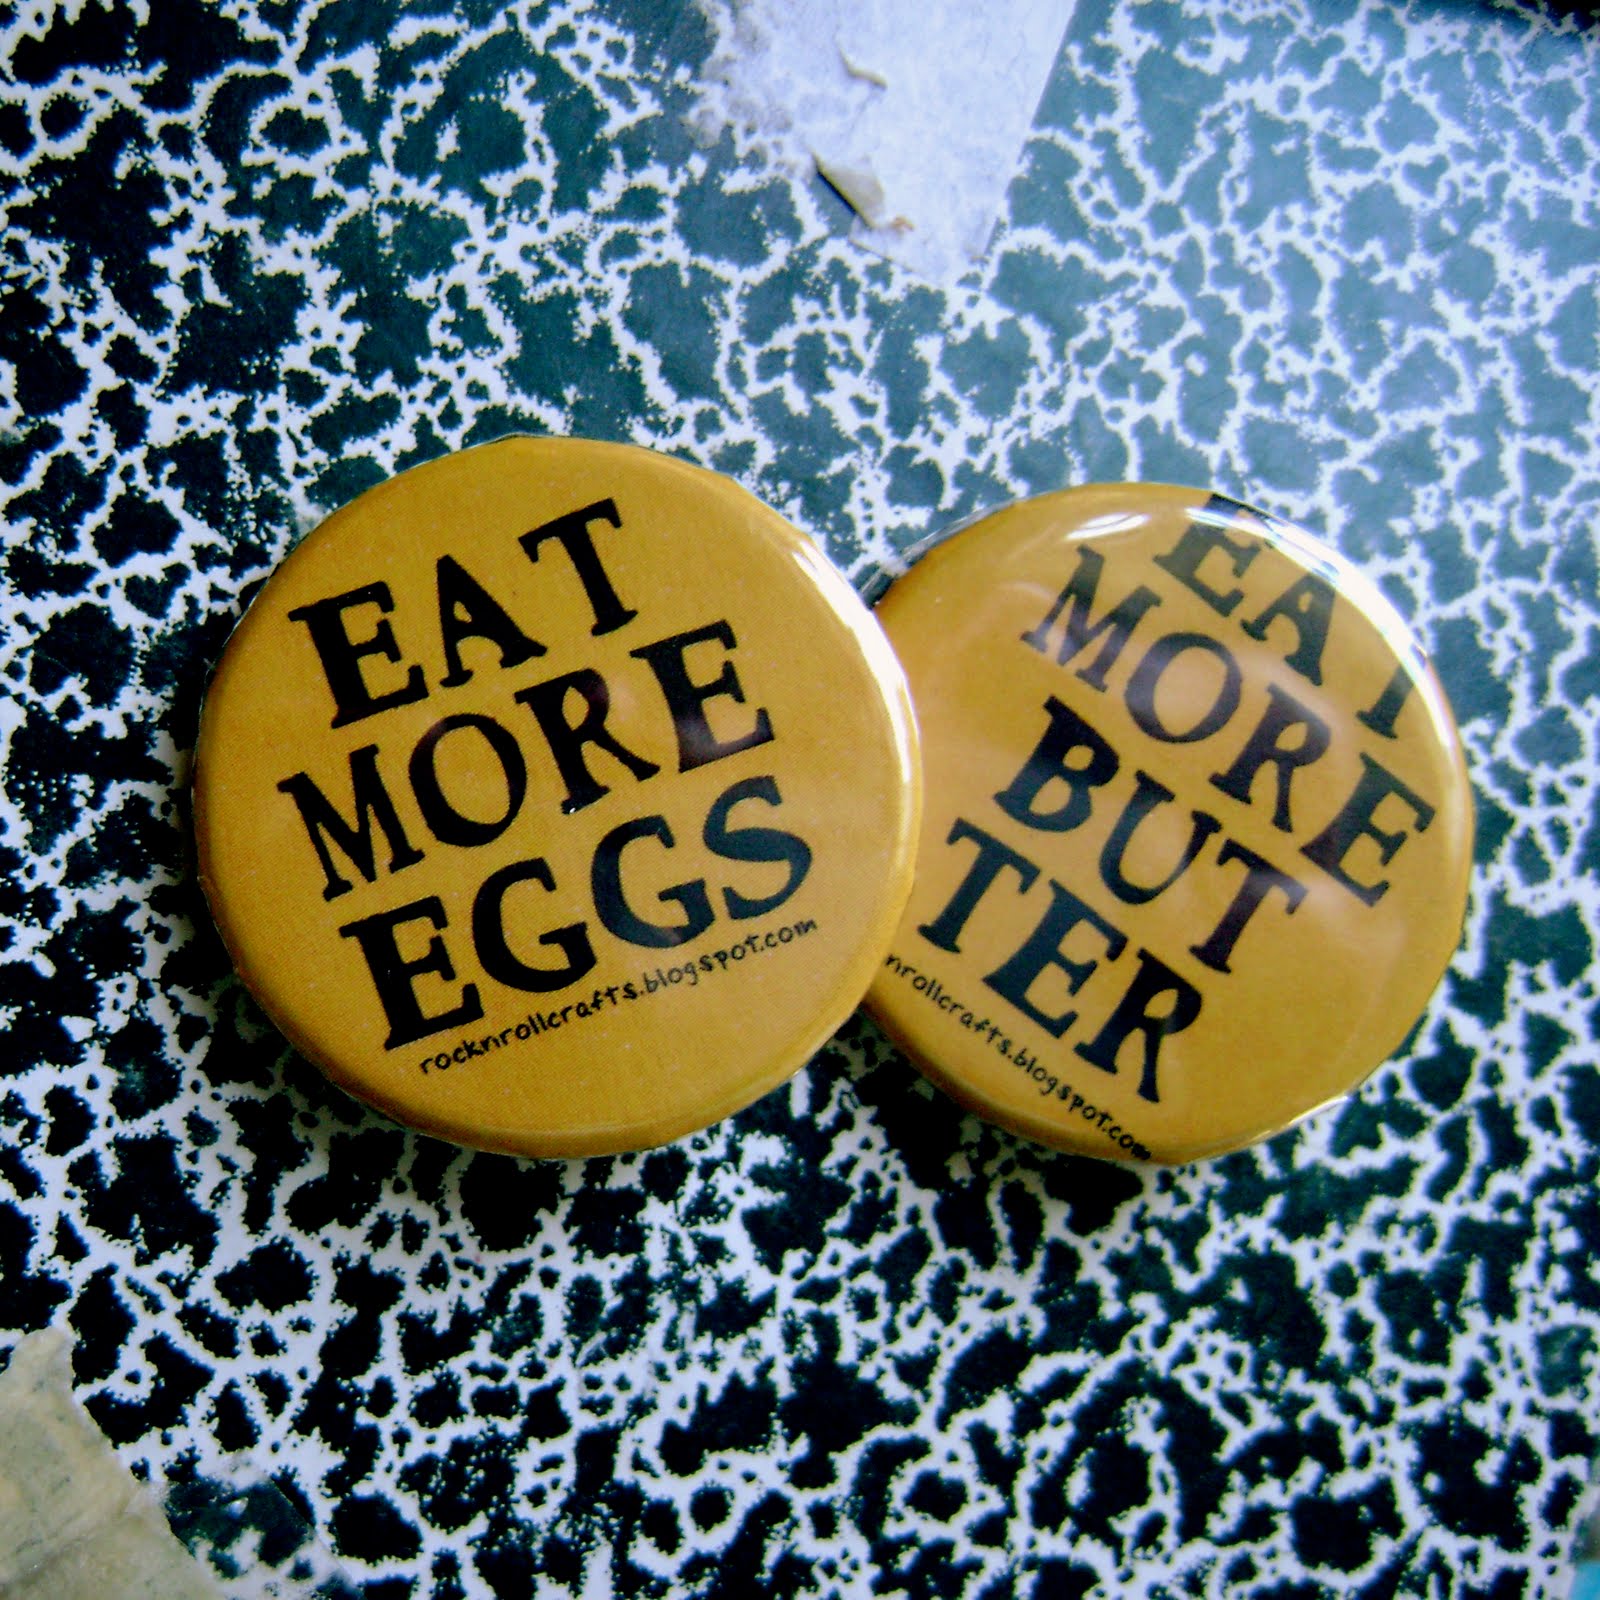
I'm working on some new buttons...the above Eat More Eggs and Eat More Butter. I'm also making some t shirts;


We'll be in the parking lot at the Mail Depot, at 4th and C st..along with Heritage Homes, the Green String Band..and so much more!! 11-4! Hope to see you there!!

Thursday, April 1, 2010

It's Happening

After a slow start, rocknrollcrafts is ready to hit the show circuit again! I'm working on a whole host of new thingys and whosies! 

The Conundrum

Our first stop will be the mail depot parking lot for the Butter & Eggs day parade!! I just finished a 
new Petaluma themed stencil;

'Eat More Eggs'

And Mom's been working on her WhoaBots...


check back for more dates and times as they get added!!

Tuesday, March 30, 2010

Here kitty, kitty

I'm watching the rain fall, listening to the cats play and thought..it's been a loooong time since I posted any kitty pictures...

Lucky consternation.

Zen Mac jr.


Lucky Tunnel Vision.

The elusive Sylvie.

Action Mac jr.

Friday, March 19, 2010

Thrift Storage

I was recently on the hunt for a new stand for out tv. This hunt included two Petaluma thrift stores, RecycleTown, Cotati thrift stores..it was a very fun day! I didn't end up finding the stand that day, but did come across the St Vincent De Paul in Rohnert Park with a 50% off sale! As I wandered around all the fun lil' knick knacks, toting a basket full of artwork and gadgetry..I came upon a most lovely site! 41 spice bottles marked 5 cents a piece!!! I bought them all for 2 1/2 cents each!! Happy Dance!! I immediately got the itch to go home and organize and label!!


And coincidentaly, my favorite blogger Cathe Holden at Just something I Made, posted a few weeks ago a great post on glitter storage. I had some of the labels that she created and generously posted for her readers to use. I cut them out and got to labeling...:)


Much to my surprise, some of the bottles had shaker tops...this should be fun for big projects..:)


and voila...from this;


{these little pots are cute..o but the mess when you knock into them!}

to this;


On the shelf and ready to go!!

Thursday, March 11, 2010

Stencils plus Glass Glitter equals True Love


With the release of their newest Stencil 1 Book, Stencil 1 Stationery, I thought it the best time to finally share my glitter stencil technique. With a little bit of modeling paste, glass glitter and a beautiful stencil image...gorgeous, glittery, crafty goodness!

 How to Make Stencils Glittery
Supplies:
For this sparkly project, you will need the following: A very cool mylar stencil (brass/metal will also work), German Glass Glitter in Silver 100 grit, some modeling paste:
a palette knife, masking tape and the project you want to make..I'm making a greeting card.
To start, tape the stencil to the front of the card with masking tape.

The tape not only holds the stencil down, but also protects the rest of the card from extra paste..I have this one taped on just one side because the mylar is protecting the rest of the card. Also note that this is one stained and dirty stencil! I thought the old ink would help in the pictures to define the image for viewing. If you are going to use a dirty stencil..just be sure that it's actually stained..or the colors could run into the paste.

So next up, apply the paste to the card with the palette knife. Use a pretty fair amount of paste and apply in a cake frosting type manner. You want to use a lot of paste because you don't want to have to run the knife over the stencil too many times. You want to get a nice, even layer of paste in the image and the more times you run the knife over the top, trying to make it "perfect", the more risk you run of pushing the pasted under the stencil and making the edges blurry.

This one didn't come out as smoothly as I would have liked..but you can always fix these during the glittering process..
Lift the stencil up and remove. I always try to lift towards the side with the tape and then up and off. You can see here that I pushed a little too much and there is a slight ring around the image..oh well. I'm still happy.

Now let's cover with glitter!!!

This is german glass glitter, 100 grit. The glass part of it makes it a little more dangerous than plastic glitters. This 100 grit is pretty fine, so not as sharp as the bigger grits. I keep a small wisk broom handy to clean up any spills or overages. You definitely don't want to get this stuck in your hand! owie.

This glitter is also sterling silver coated, so over time it has it's own patina effect..like vintage glitter. mmmm. So go ahead and just dump that glitter over the top of the paste image. Do this fairly soon after removing the stencil..the paste does set up pretty quick. I also like to very gently push the glitter into the paste..be careful. Tap off the excess and voila...For best results, let dry overnight and remove excess glitter with a clean stencil brush.


and super close up