Tuesday, December 15, 2009

Renegade ho! ho ho...


Renegade weekend is finally here!! The months of isolation, preperation and experimentation are over and I'm ready!! I have so many new pieces to show, new displays..and Ed with his new book!! It's going to be so much fun!!! See you there!!

sneak peak at the new merch;


Wednesday, December 9, 2009

Winter Shopping 2009

Yowzers. I would ask where all the time went..but do I really need to do that every december? I'm just never ready for the end of the year. Maybe the same gene that keeps me from liking the end of a really good book, or movie. I digress..Here are the last two craft shows for this year..a very craft show packed kind of year.


first up is this weekend, December 12-13, Bazaar Bizarre. I don't have my own booth here..but will have wares for sale on Saturday at the Craft Magazine booth..and then I will be helping Ed at the BB booth, on both days. I haven't been to this show yet..I'm super excited!! and then...


Ed and I, and the rest of our crafty gang, will be at the Renegade SF holiday show at Fort Mason. This one is December 19-20..and it won't be too hard to find us there..we're booth #2! Ed will be there to do book signings of his newest book..good time to pick one up if you haven't already! Plus, mom and I have been making lots of new stuff!! Hope to see you there! and Happy Holidays!!

Monday, November 9, 2009

Jen Perkins and Stencil 101 Home decor!


So Stencil 101 Home Decor is due to the shelves today!!! or are you feeling lucky and want to try and win a copy? Over at Stencil 1 blog, you can twitter yourself into your personal copy of the book! Yay! Just look what Jen Perkins, the Naughty Secretary of Crafts, did with the 11" square stencil patterns!


Check out her blog for a step by step process on the skirts she made for herself....


and her baby, Tallulah. ;) Stay tuned for more features on projects from Stencil 101 Home Decor!

Friday, October 16, 2009

Petaluma Downtown Craft Mart November 2009


Hooray and hoorah! Now in the works and accepting applications, the Petaluma Downtown Craft Mart! November 29, 2009 from noon to 5, tons of crafty goodness from local vendors! This is the sunday following thanksgiving, so we're thinking that after you've survived the craziness of black friday..come spend some green on sunday! :) Check out the blog, http://www.petalumadowntowncraftmart.com/, for daily features on vendors! and we're still accepting applications! ;)

Friday, October 9, 2009

Stencil 101 Decor-Muslin Curtains


So I got my preview copy of Stencil 101 Decor, due to hit the shelves November 2009, and it is soooo beautiful! I didn't even get any of the stencils dirty for a whole 22 hour period. :) There are 10 gorgeous 11-ish inch square, plastic stencils..set up to easily create a repeat. Perfect for walls, furniture and fabric! I've been working on my office lately, trying to clean it, organize it and make it a happy happy fun place. I rent, so no painting..boo hoo..but I thought a quick way to jazz things up would be to update my curtains. I've moved some of the furniture around so that my desk now faces right out the side window..which is great in the afternoon..but the morning glare is intense..ahhh..a perfect palette for this floral-ly design...and it just had to be an aqua colored gradient..had to be. :)


I had a bolt of muslin amongst my hoard of craft supplies, which I had already pre washed to get the sizing out..ready to be sprayed. This is what the project looks like step by step;


The supplies I needed included the aforementioned beautiful stencil, Stencil 1 spray in Turquoise, pre washed muslin cut to window size, cardboard, iron, scrap paper and blotter.


Lay muslin on cardboard, ensuring a clean flat surface, and place stencil in the bottom right corner. Use a few pieces of scratch paper to cover the edges of the stencil, to prevent overspray..you can use a few pieces of masking tape to make sure the paper doesn't move. I don't always do this because sometimes I forget they are taped together and when I pull...well, it can get messy.


No action shot of the spraying...but this is what the stencil will look like after a good spraying. I'm trying to get a gradient look, so I went a bit heavy on the first few rows of the design. Be careful when removing the stencil at this point as a heavy spray will leave a lot of ink on the stencil..which can drip. Just be sure to have a lot..lot..lot..of scratch paper and a good cleaning rag..this will help to blot up a lot of the excess ink. Plus..you end up making a lot of fun background paper!


Move stencil to the left, carefully lining up the design. There are handy, dandy tabs in the stencils themselves to help with this.


After a row of designs, it's a good idea to heat set the ink with an iron. I use a very low setting, no steam and, again, a piece of scratch paper to blot through at first. You'll see a slight change in the color of the ink as it goes to dry. At that point you can remove the blotter paper and iron directly..this takes only 30-45 seconds.


Sample of the tools for cleaning..


The first two rows done in their dark turquoise glory!


To finish off the design, I added another few rows using a very light spray..like only 2-3 pumps...this is what it looks like done...a lot less ink left over on the stencil itself.


I finished spraying and heat setting..time to sew hems and a pocket to hang..my siamese always supervises...


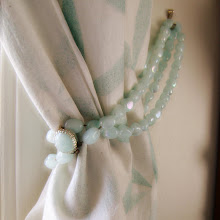
Glamour shot! I used a plastic costume jewlery necklace as a tie back..kinda cute..:)

Friday, October 2, 2009

Oh-rganized

So I have this struggle with my craft room. Everytime I attempt to clean it, I actually rearrange it. Right now, it looks like a Michael's store exploded in my house..you know, I have to spread everything in the craft room to every other room..and the garage..basement..car..This time, however, because I've been spending time trying to figure out what it is that I actually Like to do..not Have to do..this rearrangement has a different twist. It's like looking at a whole different room..and so I've been looking for inspiration..ideas..and finally found one I loooove!


This picture is from Soulemama..I just love the color..the set up..which I'll have to convert to more paper crafty..stencil friendly. the long counter top, the cutting table..the shelving..I might have too much furniture in my room;


What do you think? I'm looking for more ideas..what does your room look like?

Wednesday, September 30, 2009

Minis and Just Something Cathe Made


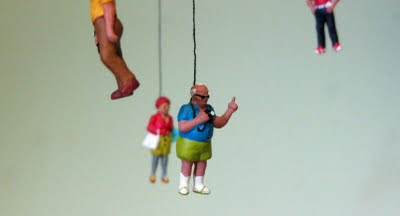
and in another case of great minds thinking alike..:)...yesterday as I purused through my google reader, checking out all of my favorite blogs, I came across this posting from Cathe Holden's Just Something I Made on a mini people mobile.
(pictured above) I nearly fell out of my chair as I read about her experiment with model train citizens..as I have been in love with railroad mini's now for most of the year. I've been gluing these little guys just about everywhere I can find..thought about a mobile, but never made one..but look how cute Cathe's came out!! I die.

Here is a little scene that I put together on a model railroad, G scale wooden pallet. This one features a sinister scene of the cheating wife, her lover and her husband..had to make it a bit mystical, hence the giant mushroom! I'll have a few of these scenes, all different set ups, on etsy this week!


Tuesday, September 29, 2009

Just messin' around...


and now...time for something a little different..


I've been spending a lot of time lately just playing. I don't have too much going on right now, so I have the time to kind of just make what I want to make. I'm not worried about inventory for a show, or samples for a catalog or feeding this wonderful blog..:)..so without too much explanation, I thought I would just share a few of the things I've been making...


...scraps of cardboard, acrylic paint, stencil 1 stencils, and some drawing..fun little banner for the wall...


...mini banner...


the petaluma clock tower from western at the blvd..on a redwood scrap..lovin' the spray paint!

Monday, September 21, 2009

Stencil 101; Home Decor


Are you ready for this?? Huge, square stencils ready for walls, fabric..paper!! Here is a sneak preview video from Ed at Stencil 1 for his new book, hitting shelves in October, Stencil 101 Decor. Filled with 11 1/2 " square stencils, featuring repeatable patterns like houndstooth, q bert checkers..and so much more!! I can't wait to get mine..and craft the nights away! Pre-order yours today! :)


Wednesday, September 2, 2009

Magic Bullets


Magic Bullets - Photo by Simron Gill

Hey everyyyybodyyyy! I've been gone for a while...hitting the craft show circuit like a madwoman! Mom and I packing and selling our wares all over this fruitful northern california!
We've been having a great time meeting all our fellow crafters and craft appreciators! We did the Rock Make Street Festival a few weekends back in San Francisco. There were 15 bands..and so much good music! I've fallen head over heels for the Magic Bullets..click the picture to hear 'Yesterday's seen better Days'....lovely...:)

Monday, August 17, 2009

Rock Make Street Festival


and next up on this busy summer show schedule; Rock Make Street Festival. Happening this coming Sunday, August 23rd, from 11-7..situated between 17th and 18th, on Treat street in San Francisco. 15 bands, 2 stages and 70 vendors!! I'm painting and stenciling all sorts of new stuff..can't wait! Hope to see you there!

Tuesday, July 28, 2009

How- to; Eraser Earrings


I love, love, love erasers. madly. This is one collection that I have managed to keep tame, in my massive hording of supplies..but I just couldn't resist these cutie little Lisa Frank erasers. As I tried to convince myself that indeed they should come home with me..I challenged me to make something with them..and thus the Eraser earrings were created..(loud claps of thunder in the background..)


Here are my two favorite designs from the pack..I added a few vintage crystals and some other silver findings to finish them off!


Here's what you need to make your own! Two really cute erasers..or not cute, if you prefer, two headpins, two earring hanger-y things and some jewelery making tools like needlenose plyers and wire cutters.


Carefully push a headpin through the core of the eraser. Go slowly so as not to go through the face of the eraser..this takes some practice.


Pull the pin the rest of the way through with the plyers and then wrap.


close-up of the wrapping..on another pair of star eraser earrings..Loop these on to the earrings and voila! Eraser earrings!


of course..now I'm looking at erasers in a whole new light..love me some donut earrings! or do I hear charm bracelet??

Wednesday, July 22, 2009

I'm on my Favorite Blog


So the Renegade Craft show was a Blast!! So many creative vendors, happy shoppers..treats and goodies to be seen everywhere! On saturday I had been showing my sister some cool posters from Seattle Show Posters, when my mom came into the booth to say there was somebody buying one of my canvases and that they wanted to meet me. So..without hesitation, I went straight back to my booth..and imagine my surprise when the customer turned out to be the lovely Cathe Holden, author of my favorite blog; Just Something I Made. It was like a Michael Jackson meeting Marlon Brando moment..I love your work, no I love Your work..it was great!! She thanked me in her write up for making her feel like a rock star..which she is! If you haven't checked out her blog..don't wait any longer! She always has great, useful projects with step by step intructions! Plus..she is a fellow Petaluman. Love her. The picture above is from her blog...doesn't the shelf with my Bodega canvas look great!? I'll be posting more this week of some of the goodies I picked up at the show..and I'll be updating my calender with next shows in the queue..next, next is another Mini maker faire at Copperfields on August 1st!

Wednesday, July 15, 2009

Renegade Craft Fair This Weekend


Come on down this coming weekend, July 18th and 19th..to the Festival pavilion at the Fort Mason center in San Francisco for two days of craft craziness! Rock n Roll crafts will have a booth, #97, featuring artwork and crafty goodies from moi, Elaine Barr, my mama, Kaethe Phelps and Stencils and books from Ed at Stencil 1. In fact Ed will also be doing book signings at the Chronicle books booth..and did I hear book Give-a-way!! We sure hope you can make it and come by to say hi!

Thursday, July 9, 2009

Hometown Demo


This coming saturday..I've been invited to show off my make at the Copperfields Mini Maker Faire! I'll be showing how to stencil t shirts, using a variety of methods. The mini faire starts at 11 am and will go till 1...Hope to see you there! ;) e

Wednesday, June 24, 2009

Shrink Plastic Stencil How To


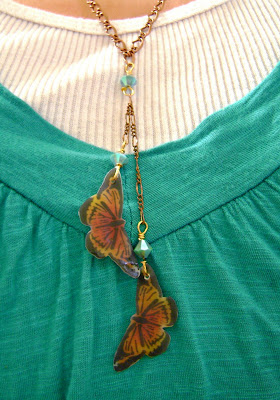
Ok...I am sooo on a roll with the new Stencil 1 mini stencils!! The sizes are so fun for so many different sufaces. Enough with the so's...anywhooo...I was recently gifted a bag of shrink plastic from my dear old craft hording mom, and thought, hmmm..I haven't used that stuff for a long time. and I made myself a butterfly necklace. Though..once my friend Mandy sees it, it probably won't belong to me anymore. :) below, you'll find a quick little tutorial on how to turn your favorite Stencil 1 image into a fun plastic charm!


The neccessary tools of this trade; Shrink Plastic, Stencil 1 mini chimp, and for comparison sake, the not-so-mini chimp, Stencil 1 Sprays, fine grade sandpaper, heat tool, scissors, poker to hold shrinking plastic down, some beads and findings to complete your jewelry piece.


Start by cutting a piece of shrink plastic and sanding it on both sides. (For this piece, I used the frosted shrink plastic, which is a frosty sheer.) Sanding in a cross hatch pattern will help the sprays stick to the plastic.


Color one side of shrink plastic, I used the sprays in Neon Pink, Neon Yellow and Blue. Spray just a few dots and then blot with a cosmetic sponge.


Turn shrink plastic over and sponge stencil designs with spray in black. Spray just once into a cosmetic sponge (for illustration of use watch; http://tinyurl.com/stencilsprayvideo ) and blot lightly through stencil.


Remove stencils...


Cut images out with scissors, along the edgs of design.


Using a holding device, I used a paper piercing tool..but you could use a popsicle stick or tweezers, and heat directly from the top with heat tool.


The plastic will start shrinking and warping..don't freak out..it will curl back out and flatten. Be sure to move the heat around to each part of the image to make it an even heating. These images are pretty small, so they are easy to shrink in this way. Something larger or more complex in shape may be better off in a toaster oven.


Once shrunk all of the way, you can use some kind of flat object to flatten out the charm...


Voila!


Here is the shrink comparison with the original sizes of the stencil..the charm on the left is really dark looking in this picture..which reminds me to mention..when adding color to the shrink plastic, always keep it light. The color becomes more concentrated as it shrinks and will intensify..


Chimp charms!!


Yeah..we made it to earrings!! Happy Chimp Charm Earrings!!