Tuesday, March 30, 2010

Here kitty, kitty

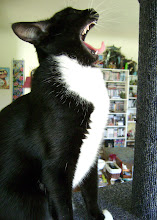
I'm watching the rain fall, listening to the cats play and thought..it's been a loooong time since I posted any kitty pictures...

Lucky consternation.

Zen Mac jr.


Lucky Tunnel Vision.

The elusive Sylvie.

Action Mac jr.

Friday, March 19, 2010

Thrift Storage

I was recently on the hunt for a new stand for out tv. This hunt included two Petaluma thrift stores, RecycleTown, Cotati thrift stores..it was a very fun day! I didn't end up finding the stand that day, but did come across the St Vincent De Paul in Rohnert Park with a 50% off sale! As I wandered around all the fun lil' knick knacks, toting a basket full of artwork and gadgetry..I came upon a most lovely site! 41 spice bottles marked 5 cents a piece!!! I bought them all for 2 1/2 cents each!! Happy Dance!! I immediately got the itch to go home and organize and label!!


And coincidentaly, my favorite blogger Cathe Holden at Just something I Made, posted a few weeks ago a great post on glitter storage. I had some of the labels that she created and generously posted for her readers to use. I cut them out and got to labeling...:)


Much to my surprise, some of the bottles had shaker tops...this should be fun for big projects..:)


and voila...from this;


{these little pots are cute..o but the mess when you knock into them!}

to this;


On the shelf and ready to go!!

Thursday, March 11, 2010

Stencils plus Glass Glitter equals True Love


With the release of their newest Stencil 1 Book, Stencil 1 Stationery, I thought it the best time to finally share my glitter stencil technique. With a little bit of modeling paste, glass glitter and a beautiful stencil image...gorgeous, glittery, crafty goodness!

 How to Make Stencils Glittery
Supplies:
For this sparkly project, you will need the following: A very cool mylar stencil (brass/metal will also work), German Glass Glitter in Silver 100 grit, some modeling paste:
a palette knife, masking tape and the project you want to make..I'm making a greeting card.
To start, tape the stencil to the front of the card with masking tape.

The tape not only holds the stencil down, but also protects the rest of the card from extra paste..I have this one taped on just one side because the mylar is protecting the rest of the card. Also note that this is one stained and dirty stencil! I thought the old ink would help in the pictures to define the image for viewing. If you are going to use a dirty stencil..just be sure that it's actually stained..or the colors could run into the paste.

So next up, apply the paste to the card with the palette knife. Use a pretty fair amount of paste and apply in a cake frosting type manner. You want to use a lot of paste because you don't want to have to run the knife over the stencil too many times. You want to get a nice, even layer of paste in the image and the more times you run the knife over the top, trying to make it "perfect", the more risk you run of pushing the pasted under the stencil and making the edges blurry.

This one didn't come out as smoothly as I would have liked..but you can always fix these during the glittering process..
Lift the stencil up and remove. I always try to lift towards the side with the tape and then up and off. You can see here that I pushed a little too much and there is a slight ring around the image..oh well. I'm still happy.

Now let's cover with glitter!!!

This is german glass glitter, 100 grit. The glass part of it makes it a little more dangerous than plastic glitters. This 100 grit is pretty fine, so not as sharp as the bigger grits. I keep a small wisk broom handy to clean up any spills or overages. You definitely don't want to get this stuck in your hand! owie.

This glitter is also sterling silver coated, so over time it has it's own patina effect..like vintage glitter. mmmm. So go ahead and just dump that glitter over the top of the paste image. Do this fairly soon after removing the stencil..the paste does set up pretty quick. I also like to very gently push the glitter into the paste..be careful. Tap off the excess and voila...For best results, let dry overnight and remove excess glitter with a clean stencil brush.


and super close up

Friday, March 5, 2010

Little Putians


I'm a pretty cheap date. Luckily for my husband. :) I've been staying away from ebay for years now...the tempatation is not so good for my weak wallet. Last week I just wanted to look around a little, see if there was anything miniature of interest. I found a listing with only 15 minutes left on it..and for 55 cents, I won 100 unpainted miniature figures!


So excited. 100 sounds like a lot...but they are soo tiny, it fit into a tiny ziplock bag. I have a whole set of Testors  model paints and planned on using those to 'dress' my little figures...but without the proper ventilation at 11 at night, I settled on this huge array of sharpie markers Ed gave me. and they work!! look for these little guys to be showing up on the ConunDrums!


Thursday, March 4, 2010

Hello 2010!


Could it be? No...really? Am I actually blogging again? Sheesh..the pressure of taking 3 months off! I was starting to feel like I'd never blog again! So where have I been, you may ask? Well, I am now a mac..for starters. I've been getting used to a new computer...it's an oldie, but a goodie..but a little slow, so I've had to gather up my patience and work with it on it's terms. And then there is that general malaise that comes with the holidays and the start of a new year. I know, it's already March. Freaking March!
I haven't been idle whilst not blogging...in fact, I've got so many new projects and pieces and stories to share!! I'm ready to go! So here's a little tid bit to get going...thanks for sticking around!! :)

 New up on etsy..ConunDrums..:) Miniature worlds on drum and barrel tops.


a picture of show I did a piece for at Heebe Jeebes in Downtown Petaluma..I'll post the close up pictures in a seperate post. Mine is the turquoise frame..

lucky in the sun...


cary and I goofing around...he's still loving his self stenciled t shirt!

Tuesday, December 15, 2009

Renegade ho! ho ho...


Renegade weekend is finally here!! The months of isolation, preperation and experimentation are over and I'm ready!! I have so many new pieces to show, new displays..and Ed with his new book!! It's going to be so much fun!!! See you there!!

sneak peak at the new merch;


Wednesday, December 9, 2009

Winter Shopping 2009

Yowzers. I would ask where all the time went..but do I really need to do that every december? I'm just never ready for the end of the year. Maybe the same gene that keeps me from liking the end of a really good book, or movie. I digress..Here are the last two craft shows for this year..a very craft show packed kind of year.


first up is this weekend, December 12-13, Bazaar Bizarre. I don't have my own booth here..but will have wares for sale on Saturday at the Craft Magazine booth..and then I will be helping Ed at the BB booth, on both days. I haven't been to this show yet..I'm super excited!! and then...


Ed and I, and the rest of our crafty gang, will be at the Renegade SF holiday show at Fort Mason. This one is December 19-20..and it won't be too hard to find us there..we're booth #2! Ed will be there to do book signings of his newest book..good time to pick one up if you haven't already! Plus, mom and I have been making lots of new stuff!! Hope to see you there! and Happy Holidays!!

Monday, November 9, 2009

Jen Perkins and Stencil 101 Home decor!


So Stencil 101 Home Decor is due to the shelves today!!! or are you feeling lucky and want to try and win a copy? Over at Stencil 1 blog, you can twitter yourself into your personal copy of the book! Yay! Just look what Jen Perkins, the Naughty Secretary of Crafts, did with the 11" square stencil patterns!


Check out her blog for a step by step process on the skirts she made for herself....


and her baby, Tallulah. ;) Stay tuned for more features on projects from Stencil 101 Home Decor!

Friday, October 16, 2009

Petaluma Downtown Craft Mart November 2009


Hooray and hoorah! Now in the works and accepting applications, the Petaluma Downtown Craft Mart! November 29, 2009 from noon to 5, tons of crafty goodness from local vendors! This is the sunday following thanksgiving, so we're thinking that after you've survived the craziness of black friday..come spend some green on sunday! :) Check out the blog, http://www.petalumadowntowncraftmart.com/, for daily features on vendors! and we're still accepting applications! ;)

Friday, October 9, 2009

Stencil 101 Decor-Muslin Curtains


So I got my preview copy of Stencil 101 Decor, due to hit the shelves November 2009, and it is soooo beautiful! I didn't even get any of the stencils dirty for a whole 22 hour period. :) There are 10 gorgeous 11-ish inch square, plastic stencils..set up to easily create a repeat. Perfect for walls, furniture and fabric! I've been working on my office lately, trying to clean it, organize it and make it a happy happy fun place. I rent, so no painting..boo hoo..but I thought a quick way to jazz things up would be to update my curtains. I've moved some of the furniture around so that my desk now faces right out the side window..which is great in the afternoon..but the morning glare is intense..ahhh..a perfect palette for this floral-ly design...and it just had to be an aqua colored gradient..had to be. :)


I had a bolt of muslin amongst my hoard of craft supplies, which I had already pre washed to get the sizing out..ready to be sprayed. This is what the project looks like step by step;


The supplies I needed included the aforementioned beautiful stencil, Stencil 1 spray in Turquoise, pre washed muslin cut to window size, cardboard, iron, scrap paper and blotter.


Lay muslin on cardboard, ensuring a clean flat surface, and place stencil in the bottom right corner. Use a few pieces of scratch paper to cover the edges of the stencil, to prevent overspray..you can use a few pieces of masking tape to make sure the paper doesn't move. I don't always do this because sometimes I forget they are taped together and when I pull...well, it can get messy.


No action shot of the spraying...but this is what the stencil will look like after a good spraying. I'm trying to get a gradient look, so I went a bit heavy on the first few rows of the design. Be careful when removing the stencil at this point as a heavy spray will leave a lot of ink on the stencil..which can drip. Just be sure to have a lot..lot..lot..of scratch paper and a good cleaning rag..this will help to blot up a lot of the excess ink. Plus..you end up making a lot of fun background paper!


Move stencil to the left, carefully lining up the design. There are handy, dandy tabs in the stencils themselves to help with this.


After a row of designs, it's a good idea to heat set the ink with an iron. I use a very low setting, no steam and, again, a piece of scratch paper to blot through at first. You'll see a slight change in the color of the ink as it goes to dry. At that point you can remove the blotter paper and iron directly..this takes only 30-45 seconds.


Sample of the tools for cleaning..


The first two rows done in their dark turquoise glory!


To finish off the design, I added another few rows using a very light spray..like only 2-3 pumps...this is what it looks like done...a lot less ink left over on the stencil itself.


I finished spraying and heat setting..time to sew hems and a pocket to hang..my siamese always supervises...


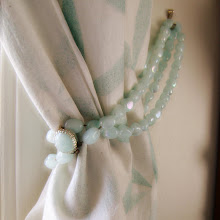
Glamour shot! I used a plastic costume jewlery necklace as a tie back..kinda cute..:)