So I got my preview copy of Stencil 101 Decor, due to hit the shelves November 2009, and it is soooo beautiful! I didn't even get any of the stencils dirty for a whole 22 hour period. :) There are 10 gorgeous 11-ish inch square, plastic stencils..set up to easily create a repeat. Perfect for walls, furniture and fabric! I've been working on my office lately, trying to clean it, organize it and make it a happy happy fun place. I rent, so no painting..boo hoo..but I thought a quick way to jazz things up would be to update my curtains. I've moved some of the furniture around so that my desk now faces right out the side window..which is great in the afternoon..but the morning glare is intense..ahhh..a perfect palette for this floral-ly design...and it just had to be an aqua colored gradient..had to be. :)


I had a bolt of muslin amongst my hoard of craft supplies, which I had already pre washed to get the sizing out..ready to be sprayed. This is what the project looks like step by step;

The supplies I needed included the aforementioned beautiful stencil,
Stencil 1 spray in Turquoise, pre washed muslin cut to window size, cardboard, iron, scrap paper and blotter.

Lay muslin on cardboard, ensuring a clean flat surface, and place stencil in the bottom right corner. Use a few pieces of scratch paper to cover the edges of the stencil, to prevent overspray..you can use a few pieces of masking tape to make sure the paper doesn't move. I don't always do this because sometimes I forget they are taped together and when I pull...well, it can get messy.

No action shot of the spraying...but this is what the stencil will look like after a good spraying. I'm trying to get a gradient look, so I went a bit heavy on the first few rows of the design. Be careful when removing the stencil at this point as a heavy spray will leave a lot of ink on the stencil..which can drip. Just be sure to have a lot..lot..lot..of scratch paper and a good cleaning rag..this will help to blot up a lot of the excess ink. Plus..you end up making a lot of fun background paper!

Move stencil to the left, carefully lining up the design. There are handy, dandy tabs in the stencils themselves to help with this.

After a row of designs, it's a good idea to heat set the ink with an iron. I use a very low setting, no steam and, again, a piece of scratch paper to blot through at first. You'll see a slight change in the color of the ink as it goes to dry. At that point you can remove the blotter paper and iron directly..this takes only 30-45 seconds.

Sample of the tools for cleaning..

The first two rows done in their dark turquoise glory!

To finish off the design, I added another few rows using a very light spray..like only 2-3 pumps...this is what it looks like done...a lot less ink left over on the stencil itself.

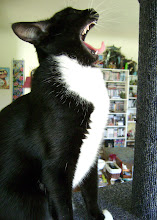
I finished spraying and heat setting..time to sew hems and a pocket to hang..my siamese always supervises...

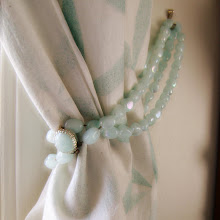
Glamour shot! I used a plastic costume jewlery necklace as a tie back..kinda cute..:)